Bedroom clutter creeps up fast. Clothes pile up on chairs, books crowd nightstands, and boxes stack in corners until the space that should feel restful turns into a visual stress test. Wall storage changes that equation. By moving items off the floor and onto walls, you reclaim square footage, improve sight lines, and make your bedroom actually feel larger. Better yet, most wall storage projects don’t require professional installation or expensive remodeling. Whether you’re working with a compact bedroom or just want to maximize what you’ve got, smart bedroom wall storage offers practical solutions that blend form and function.
Table of Contents
ToggleKey Takeaways
- Bedroom wall storage solutions like floating shelves, pegboards, and cubbies move clutter off the floor and onto walls, instantly making your bedroom feel larger and more spacious without expensive remodeling.
- Floating shelves should not exceed 48 inches in width and require solid stud placement with brackets rated for 25–50 pounds, depending on span and contents like books or décor.
- Pegboard systems offer affordable, modular flexibility—allowing you to reconfigure hooks and accessories without patching walls, making it ideal for bedrooms that need frequent layout changes.
- Over-the-door and wall-behind-door storage maximize unused vertical real estate by holding frequently accessed lightweight items like robes, belts, and shoes without consuming floor or wall space.
- Most bedroom wall storage projects require only basic tools (stud finder, level, drill, tape measure), proper fastener selection, and accurate stud location to ensure long-lasting, secure installation.
- Choose a bedroom wall storage approach that targets your biggest clutter problem first—whether shoes, books, or accessories—then customize the solution to match your space and style.
Floating Shelves and Wall-Mounted Storage Units
Floating shelves remain the workhorse of bedroom wall storage. They’re clean, flexible, and surprisingly simple to install if you hit the studs.
Choosing the Right Style and Material
Floating shelves come in three main categories: solid wood, engineered wood, and metal-framed designs. Solid wood (oak, pine, walnut) looks premium but costs more and requires sealing if moisture is a concern. Engineered wood, plywood with veneer or laminate, offers affordability and consistency, though cheap versions sag under weight. Metal frames with wood or glass tops give an industrial feel and usually distribute weight better than cantilever-only designs.
Measure your available wall space before ordering. A typical bedroom shelf runs 24 to 48 inches wide: anything longer than 48 inches should have mid-span support or you’ll invite sag over time, even with quality brackets. Standard floating shelf brackets come in L-brackets (bolted through the shelf into studs) or French cleats (rail-and-hook systems). L-brackets are faster to install: French cleats adjust more easily if you need to relocate later.
Weight capacity matters. If you’re stacking books or heavy décor, confirm the bracket rating, most are rated for 25 to 50 pounds per shelf depending on span and stud spacing. Position shelves 12 to 18 inches apart vertically for books: leave more clearance if storing decorative items or framed photos. Always locate studs with a stud finder (not just knocking on drywall): drywall anchors alone won’t support meaningful weight long-term.
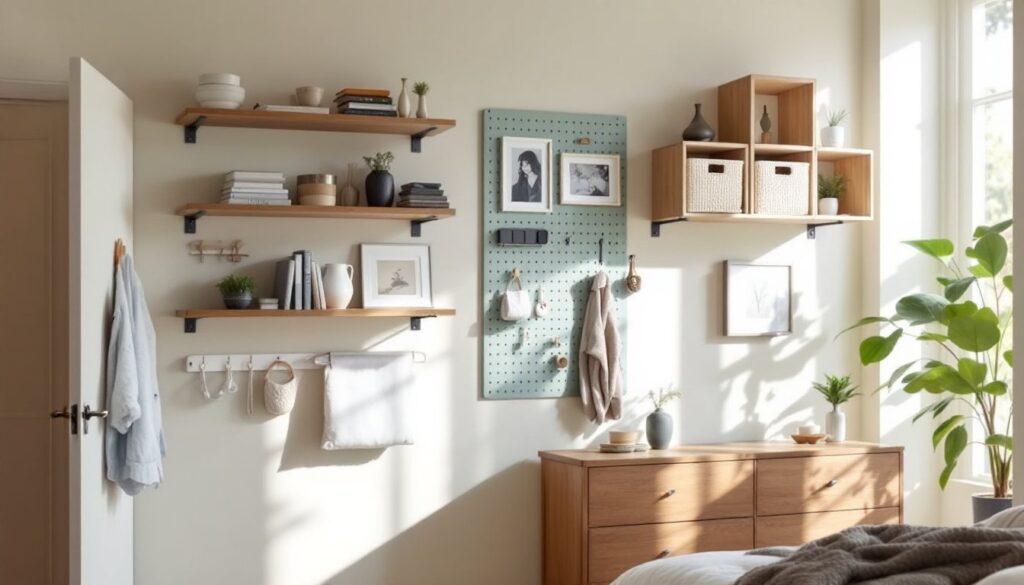
Vertical Pegboard and Hook Systems
Pegboard is underrated for bedrooms. It’s affordable, modular, and quick to install, plus you can reconfigure it whenever you want without patching walls.
Standard pegboard is 1/4-inch thick hardboard with 3/8-inch holes spaced 1 inch apart. Hang it directly onto studs using washers and wood screws every 16 inches, or mount it on spacer blocks (thin strips of wood) to keep it slightly away from the wall so hooks and pegs sit properly. Paint or stain it to match your décor: it’s just wood, so any interior finish works.
Peg hooks come in dozens of styles, straight hooks for belts and bags, shelves for small bins, holders for baskets or organizers. This modularity is pegboard’s secret weapon. Arrange hooks to suit what you actually store, not what a style magazine suggests. Using pegboard for accessories keeps them visible and accessible, which beats cramming them into drawers where they disappear.
Size your pegboard to the wall. A 2-foot by 4-foot sheet works well above a desk or dresser: larger installations across an entire wall make bold statements. Paint the wall behind the board a complementary color if desired, solid pegboard looks flat otherwise. IKEA’s pegboard system offers affordable pegs and components, and the hacking community shows endless creative mounting ideas. Pre-paint or finish before installation to avoid brush marks and dust on hardware.
Over-the-Door and Wall-Behind-Door Storage
The space behind a door is wasted real estate in most bedrooms. Over-the-door organizers, hooks, and shelving reclaim it without taking up floor or wall area.
Over-the-door hooks mount to the top of the door frame, no drilling, no installation mess. They hold robes, belts, bags, and lightweight items instantly. Expect 10 to 15 pounds of capacity depending on the hook design. If your door swings inward, make sure hooks don’t interfere with the swing: if they do, look for slim, low-profile designs.
Over-the-door shelves and organizers are typically fabric or wire units that hang from a bar across the top of the frame. They’re perfect for shoes, scarves, and seasonal items. Verify the frame is sturdy enough: hollow-core interior doors flex, so test the weight distribution before loading heavily.
Alternatively, install a narrow shelf directly on the wall behind where the door closes. This works only if the wall space doesn’t interfere with door swing, but it’s solid and doesn’t rely on the door frame. Mount it 10 to 15 inches above the doorknob for easy reach without bumping heads.
The key insight: behind-door storage suits lightweight, frequently accessed items. Anything you grab regularly belongs here: anything you rarely need belongs deeper in a closet or under the bed.
Wall Cubbies and Niche Shelving
Wall cubbies, boxes recessed into or mounted directly on a wall, provide contained, uniform storage that feels intentional rather than hodgepodge.
Pre-made cubby systems (think modular cube units) mount to studs and come in square or rectangular configurations. They’re popular, affordable, and available in wood, plastic, or metal. Stack them 2 to 3 high depending on ceiling height: more than 3 stacks can feel claustrophobic in a bedroom. Anchor top cubes to prevent tipping if kids or pets live in the home.
Built-in niches offer a more permanent solution. If you’re willing to do (or hire for) structural work, cutting a niche into a non-load-bearing wall is feasible. Carve out space between studs (typically 14.5 inches of clear width), install a 1×12 shelf on cleats, and frame it with trim. This requires drywall patching, stud location mapping, and electrical line avoidance if wires run through the wall. Many jurisdictions don’t require a permit for this work on interior, non-load-bearing walls, but verify locally.
For renters or anyone hesitant about wall surgery, floating cubby shelves, individual boxes that mount like shelves, offer the niche look without permanent modification. They cost more than flat shelves but create visual interest and horn-in wasted wall real estate.
Style these thoughtfully. Cubbies stuffed with random items look cluttered: cubbies with matching bins, folded textiles, and intentional spacing look curated. This constraint actually helps: it forces you to be selective about what lives in your bedroom.
Installing Bedroom Wall Storage: Tools and Tips
Most wall storage projects require minimal tools and skills. Here’s what you need and a few hard-won tips.
Essential tools:
• Stud finder (electronic is worth the $15–25 investment)
• Level (2-foot is standard: a laser level helps with long runs)
• Drill-driver with bits for fasteners and pilot holes
• Tape measure and pencil
• Saw (circular or miter saw if cutting shelves: most come pre-cut anyway)
Critical prep steps:
-
Locate studs. Most walls have studs every 16 inches on center (OC). Use a stud finder, or knock and listen for solid response. Mark stud locations lightly with pencil. Never guess and drive fasteners into drywall: they’ll slip and the shelf will fail.
-
Use appropriate fasteners. For studs, use #10 or #12 wood screws (3 to 3.5 inches long, depending on bracket design). If you must hit drywall (not ideal), use heavy-duty anchors rated for your shelf’s weight. Toggle bolts and lag shields work better than plastic anchors for anything heavy.
-
Check level. A shelf that tilts even slightly looks wrong and encourages items to slide. Use a level before final tightening: shim with washers if needed.
-
Leave clearance. If installing shelves above a desk, dresser, or bed, measure twice before drilling. You want 12 to 18 inches above the surface so things don’t bump heads and the shelf doesn’t feel oppressive.
Safety notes: Wear eye protection when drilling overhead or into walls (drywall dust and bit debris fly). A dust mask helps if you’re doing significant drywall work. Hearing protection isn’t always necessary for drilling, but it’s good practice if you’re using power tools extensively.
Common mistakes: Underestimating weight capacity (books are heavy: plan for 30 to 40 pounds per shelf), forgetting to drill pilot holes in wood (causes splitting), and ignoring stud locations entirely. Woodworking plans on Ana White and Fix This Build That offer free detailed guides if you want to build custom shelves or cubbies rather than buy pre-made. Building your own gives you exact dimensions and material choice, though it takes more time and skill.
Most bedroom storage installs take an afternoon. Take your time, check twice, drill once, and you’ll have functional, attractive storage that lasts years.
Conclusion
Bedroom wall storage isn’t about cramming more stuff into your room, it’s about using vertical space so the room feels less crowded. Floating shelves, pegboards, cubbies, and over-the-door organizers each solve different problems. Start with what bothers you most (shoes everywhere? books stacked on the nightstand?) and choose a solution that matches your space and style. Most projects are weekend-level DIY. The payoff is a bedroom that finally breathes, where you can actually find what you need, and that does more work with less visual noise.